How to Cover Kitchen Cabinets
Introduction to Covering Kitchen Cabinets
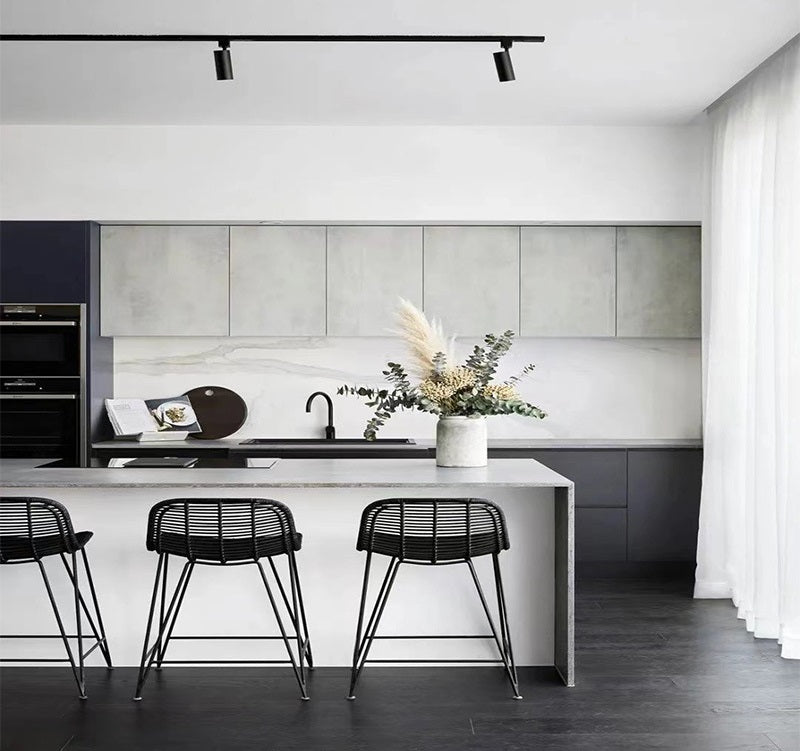
Welcome to our detailed guide on how to transform your kitchen by covering your kitchen cabinets. This popular DIY project not only revitalizes the look of your kitchen but also offers protection and extends the lifespan of your cabinets. Whether you're aiming to update the style, protect cabinets from wear and tear, or simply crave a change without a full-scale renovation, covering your cabinets is a practical and effective solution.
When it comes to covering kitchen cabinets, several methods stand out, each catering to different tastes and skill levels. Painting offers a straightforward and customizable approach, allowing for a complete color change. Adhesive paper and vinyl wraps provide a quick and diverse option, with various patterns and textures to choose from. Wood veneers are perfect for adding a natural and elegant wood finish, while laminates offer durability and ease of cleaning. Each of these methods comes with its unique set of steps and considerations, which we will explore in detail to help you achieve the best results for your kitchen makeover.
Stay tuned as we delve deeper into the process, starting with assessing your kitchen cabinets to ensure a smooth and successful cabinet transformation.
Assessing Your Kitchen Cabinets
Before embarking on the journey of covering your kitchen cabinets, it's crucial to assess their current condition and understand the material they are made of. This initial assessment will guide you in choosing the most suitable covering method and ensure a successful and lasting update.
Understanding Your Cabinet Material
Kitchen cabinets can be made from a variety of materials, each with its own characteristics and requirements when it comes to covering. The most common materials include:
-
Wood: Traditional and versatile, wood cabinets can be found in many homes. They can be painted, stained, or veneered, but it's essential to understand the type of wood and its condition.
-
Laminate: Popular for its affordability and variety of designs, laminate cabinets can be tricky to cover due to their smooth surface. Special primers and techniques are required for effective adhesion.
-
Metal: Less common, metal cabinets are durable and offer a unique look. They require specific types of paint and preparation for a successful covering.
-
Thermofoil and Melamine: These materials are used for a seamless and modern finish. Covering them involves specific materials and approaches, especially when dealing with peeling or damaged surfaces.
Tips on Determining Your Cabinet's Material
- Visual Inspection: Look for any identifying characteristics. Wood typically has a grain pattern, while laminate often has a glossy finish.
- Tactile Test: Feel the surface. Wood tends to be warmer and can show signs of aging, while laminate and metal are smoother and colder to the touch.
- Manufacturer’s Information: If available, check any existing documentation or labels from the manufacturer.
- Consult a Professional: If in doubt, consult a carpentry or home improvement expert.
Evaluating the Current Condition
Before proceeding, thoroughly evaluate the condition of your cabinets. This assessment is key to ensuring a successful covering process.
- Check for Damage: Look for any cracks, chips, or signs of wear. These will need to be repaired before covering.
- Assess the Surface: For paint or adhesives to adhere properly, the surface should be clean and smooth.
- Examine Hardware and Hinges: Ensure that all hardware is functional. Any loose or damaged parts should be repaired or replaced.
- Stability of the Structure: Make sure the cabinets are structurally sound. Weak or wobbly cabinets might need more than just a cosmetic update.
- Look for Signs of Moisture Damage: Particularly under the sink, check for water damage or mold, which needs to be addressed before covering.
Importance of Cleaning and Preparing the Surface
- Thorough Cleaning: Remove all grease, dust, and grime from the cabinets. This step is crucial for ensuring the new covering adheres well.
- Sanding: Lightly sanding the surface can improve adhesion, especially for glossy or smooth surfaces.
- Repairing Minor Flaws: Fill in nicks or scratches with wood filler (for wooden cabinets) to ensure a smooth base.
By carefully assessing and preparing your kitchen cabinets, you set the stage for a successful and visually pleasing update.

Choosing the Right Covering Material for Kitchen Cabinets
Selecting the appropriate material to cover your kitchen cabinets is a crucial step in your kitchen makeover. The choice you make should not only enhance the aesthetic appeal of your kitchen but also align with your practical needs and DIY skill level. Let’s explore the most popular materials: paint, adhesive paper and vinyl wraps, and wood veneers.
Paint
Painting kitchen cabinets is a popular choice for many homeowners due to its versatility and ease.
Advantages of Using Paint
- Customization: Offers a wide range of colors and finishes.
- Cost-Effective: Generally more affordable than other covering options.
- Accessibility: Painting supplies are easily available and suitable for DIY.
Step-by-Step Guide on How to Paint Kitchen Cabinets
- Remove Hardware and Doors: Start by removing cabinet doors and hardware.
- Clean Thoroughly: Clean all surfaces to be painted to remove grease and dirt.
- Sand the Surfaces: Lightly sand to create a surface that paint can adhere to.
- Prime the Cabinets: Apply a primer to ensure even and long-lasting color.
- Paint: Apply your chosen paint in thin, even layers.
- Reattach Hardware: Once the paint is dry, reattach hardware and doors.
Tips on Choosing the Right Type of Paint
- Finish: Decide between matte, semi-gloss, or glossy finishes based on your preference and kitchen's usage.
- Quality: High-quality paints ensure better coverage and durability.
- Compatibility: Ensure the paint is suitable for your cabinet's material.
Adhesive Paper and Vinyl Wraps
Adhesive paper and vinyl wraps are excellent for a quick and impactful change.
What are Adhesive Paper and Vinyl Wraps?
- Adhesive Paper: A paper-based product with a sticky back, easy to cut and apply.
- Vinyl Wraps: Durable and moisture-resistant material, ideal for kitchen environments.
How to Apply Them Properly
- Measure and Cut: Measure your cabinets and cut the material with precision.
- Clean Surfaces: Ensure the cabinet surface is clean and dry.
- Apply Slowly: Start from one end and gradually smooth out the material to avoid air bubbles.
- Trim Excess: Use a sharp blade to trim any excess material for a neat finish.
Patterns, Textures, and Design Choices
- Variety: Available in a wide range of colors, patterns, and textures.
- Customization: Can mimic different materials like wood, marble, or even custom designs.
Wood Veneers
Wood veneers provide a sophisticated and timeless look.
Overview of Wood Veneers
- Natural Look: Thin slices of real wood applied over the cabinet surface.
- Versatility: Available in various wood types and grains.
Instructions for Applying Wood Veneers
- Prepare the Surface: Clean and sand the cabinets for a smooth base.
- Cut to Size: Measure and cut the veneer accurately.
- Apply Adhesive: Use a suitable adhesive to attach the veneer to the cabinet.
- Smooth Out: Ensure there are no bubbles or wrinkles for a flawless finish.
Aesthetic and Durability
- Elegant Appearance: Adds a high-end look to your kitchen.
- Long-Lasting: Durable if properly maintained and protected from excessive moisture.
By understanding the characteristics of each material, you can make an informed decision that suits your style and kitchen’s needs.

Preparation for Covering Kitchen Cabinets
Embarking on the journey of covering your kitchen cabinets requires not just the right materials but also the proper tools and a well-prepared workspace. This preparation is key to ensuring a smooth process and a successful outcome. Here's what you need to consider:
Necessary Tools and Materials
For Painting
- Tools: Brushes, rollers, paint tray, sandpaper, painter's tape, screwdriver (for hardware removal).
- Materials: Primer, paint, drop cloths (for protecting surfaces).
-
Safety Precautions:
- Wear protective gear, such as gloves and masks.
- Ensure good ventilation to avoid inhaling fumes.
- Keep flammable materials away from the painting area.
For Adhesive Paper and Vinyl Wraps
- Tools: Scissors or a sharp knife, squeegee or smoothing tool, measuring tape.
- Materials: Your chosen adhesive paper or vinyl wrap, cleaning supplies.
-
Safety Precautions:
- Carefully handle sharp tools to avoid injury.
- Clean the area to prevent slipping on any debris.
For Wood Veneers
- Tools: Fine-grit sandpaper, utility knife, brush or roller for adhesive, clamps (optional for securing veneer).
- Materials: Wood veneer sheets, adhesive (specific to veneer), clean rags.
-
Safety Precautions:
- Wear a dust mask while sanding.
- Use clamps carefully to avoid finger pinching.
Preparing the Workspace
Steps for Setting Up a Safe and Efficient Workspace
- Clear the Area: Remove any unnecessary items from the workspace to avoid clutter.
- Surface Protection: Lay down drop cloths or plastic sheets to protect floors and countertops.
- Tool Organization: Keep tools and materials neatly organized for easy access.
- Adequate Space: Ensure there's enough room to move around safely, especially when dealing with cabinet doors and drawers.
Importance of Ventilation and Lighting
- Ventilation: Essential for safety, especially when working with paints and adhesives. Open windows or use fans to circulate air.
- Lighting: Good lighting is crucial for precision work. It helps in ensuring even application of materials and in identifying any missed spots or imperfections.
Preparing thoroughly for your kitchen cabinet covering project will not only make the process more enjoyable but also significantly affect the quality of the outcome.

Step-by-Step Guide to Covering Kitchen Cabinets
Covering your kitchen cabinets can be a rewarding DIY project that refreshes the heart of your home. To achieve the best results, follow this detailed guide, which outlines the essential steps from preparation to application.
Removing Hardware and Cleaning
Detailed Steps for Removing Handles, Hinges, and Doors
- Unscrew Handles and Pulls: Use a screwdriver to remove all handles and pulls from doors and drawers.
- Detach Hinges: Carefully unscrew the hinges from the cabinet frame, then remove the doors.
- Label Components: Label each door and its corresponding hardware to ensure easy reassembly.
Best Practices for Cleaning and Sanding Surfaces
- Cleaning: Wipe down all surfaces with a degreaser or mild detergent to remove grease and dirt.
- Sanding: Lightly sand the surfaces with fine-grit sandpaper to create a smooth base for the covering material. This step is crucial for paint and veneer applications.
- Wipe Down: After sanding, use a damp cloth to remove any dust.
Measuring and Cutting Materials
Guidance on Taking Accurate Measurements
- Measure Twice: Double-check your measurements to ensure accuracy.
- Record Dimensions: Write down the height, width, and depth of each cabinet surface.
- Consider Overlap: Allow a little extra material for trimming, especially for adhesive paper and veneers.
Tips for Cutting Materials to Size
- Use Sharp Tools: Ensure your cutting tools are sharp for clean cuts.
- Cut on a Flat Surface: Use a large, flat surface to ensure straight and even cuts.
- Mark Before Cutting: Use a pencil and ruler to mark where you need to cut.
Application Process
Step-by-Step Instructions for Each Covering Method
Painting
- Apply Primer: Coat the cabinets evenly with primer and let it dry.
- Painting: Apply the first layer of paint, let it dry, and then apply a second coat if necessary.
- Drying Time: Allow adequate time for the paint to dry completely.
Adhesive Paper and Vinyl Wraps
- Align and Stick: Start from one corner and gradually adhere the paper or wrap, smoothing out bubbles as you go.
- Trim Edges: Use a sharp knife to trim any excess material.
Wood Veneers
- Apply Adhesive: Spread adhesive evenly on the cabinet surface.
- Place Veneer: Carefully position the veneer on the cabinet, starting from one edge.
- Smooth and Secure: Use a roller or brush to smooth out the veneer and ensure it sticks properly.
Bullet Points on Common Mistakes to Avoid
- Not Allowing Enough Drying Time: Be patient between coats, especially with paint.
- Ignoring Manufacturer's Instructions: Always follow the guidelines for the materials you're using.
- Skipping Surface Preparation: Proper cleaning and sanding are crucial for a lasting finish.
- Rushing the Process: Take your time with each step for the best results.
By following these steps carefully, you can ensure a successful and satisfying kitchen cabinet makeover.

Finishing Touches and Maintenance
After successfully covering your kitchen cabinets, the final steps involve reassembling and ensuring their longevity. Proper reattachment of hardware and doors, along with ongoing care, will keep your cabinets looking their best for years to come.
Reattaching Hardware and Doors
Instructions on Reassembling the Cabinets
- Refer to Labels: Use the labels you made during disassembly to match doors with their original locations.
- Attach Hinges: Securely screw the hinges back onto the cabinet doors, then to the cabinet frames.
- Reattach Handles and Pulls: Screw the handles and pulls back onto the doors and drawers.
Tips for Aligning Doors and Drawers Correctly
- Adjust Hinges: Most hinges have adjustment screws that allow you to align the doors vertically and horizontally for a perfect fit.
- Check for Even Gaps: Ensure there is an even gap between all doors and between doors and drawers.
- Test Movement: Open and close the doors and drawers to make sure they move smoothly without sticking or rubbing.
Long-Term Care and Maintenance
Advice on Cleaning and Maintaining the New Cabinet Surfaces
- Regular Cleaning: Use a soft cloth and mild detergent to clean the surfaces. Avoid harsh chemicals or abrasive cleaners.
- Immediate Spill Cleanup: Wipe up spills and splatters immediately to prevent staining or damage, especially on painted or veneered surfaces.
- Avoid Excessive Moisture: Don't let water sit on the surfaces, as it can cause damage over time.
Discussing the Longevity of Different Covering Methods
- Paint: High-quality paint can last several years, but may require touch-ups in high-use areas.
- Adhesive Paper and Vinyl Wraps: These can last a few years but might peel or fade over time, especially near heat sources or in direct sunlight.
- Wood Veneers: When properly cared for, wood veneers can last for decades. They might require resealing or refinishing after prolonged use to maintain their appearance.
By reassembling your cabinets carefully and committing to regular maintenance, you'll ensure that your kitchen remains a beautiful and functional space. These final touches not only enhance the appearance of your project but also contribute to the durability and longevity of your cabinets.

Conclusion: Revitalize Your Kitchen with Confidence
As we wrap up our comprehensive guide on covering kitchen cabinets, let's take a moment to recap the key points we've discussed. This journey of transforming your kitchen cabinets is not just about improving the aesthetics of your space, but also about protecting and prolonging the life of your cabinetry.
We started by understanding the importance of assessing the material and condition of your cabinets, setting a solid foundation for the makeover. We then explored the various materials available for covering cabinets – paint, adhesive paper and vinyl wraps, and wood veneers – each offering unique benefits and styles. Preparation was our next focus, emphasizing the necessity of the right tools, materials, and a well-set workspace. Following this, we delved into the step-by-step process of covering the cabinets, from removing hardware and cleaning to the precise application of your chosen material.
Throughout this guide, we emphasized the significance of precision and patience, ensuring that each step is carried out with care for the best results. The finale of your project involves reattaching hardware and doors, and we provided tips for aligning everything correctly for a professional finish. Lastly, we discussed the crucial aspects of long-term care and maintenance, ensuring your hard work continues to pay off in the years to come.
Now, as you stand back and admire your transformed kitchen, remember that this space is a reflection of your personal style and creativity. Each choice you made in this process, from the color of the paint to the pattern of the vinyl wrap, contributes to making your kitchen uniquely yours. We encourage you to embrace this opportunity to personalize your space further, be it through decorative touches, new hardware, or simply by enjoying the renewed ambiance of your kitchen.
Congratulations on completing this rewarding DIY project. Your kitchen is not just a functional space; it's a canvas for your creativity, a place where memories are made, and now, a testament to your DIY skills. May you enjoy your newly transformed kitchen to the fullest! And if you're looking for more personalized options, don't forget to visit our Kitchen Cabinets Custom page for more inspiration and unique design solutions.
FAQs:
Q1: What is the best material to use for covering kitchen cabinets?
- A1: The best material depends on your specific needs and preferences. Paint is versatile and offers a wide range of colors, ideal for a custom look. Adhesive paper and vinyl wraps are great for a quick and stylish update, while wood veneers provide a classic, durable finish. Consider factors like durability, appearance, and ease of application when choosing.
Q2: How do I prepare my kitchen cabinets for covering?
- A2: Proper preparation is key for a successful cabinet covering. Start by removing all hardware and cleaning the surfaces thoroughly to remove grease and dirt. Sanding is crucial, especially for painting, to ensure the new covering adheres well. Also, make sure to repair any damages like cracks or chips before beginning the covering process.
Q3: Can I cover my kitchen cabinets myself, or should I hire a professional?
- A3: Covering kitchen cabinets can be a DIY project, depending on your skill level and the complexity of the task. Painting and applying adhesive paper or vinyl wraps are generally more accessible for DIY. However, if you're not confident in your skills, especially for tasks like applying wood veneers, hiring a professional might be a better option to ensure quality results.
Q4: How long does it typically take to cover kitchen cabinets?
- A4: The time it takes to cover kitchen cabinets can vary greatly depending on the size of your kitchen and the method you choose. A painting project might take a weekend, while applying adhesive paper or vinyl wraps could be completed in a day. Wood veneers might require more time, especially if you're hiring a professional. Always allow extra time for preparation and drying.
Q5: How do I maintain my newly covered kitchen cabinets?
- A5: Maintenance depends on the covering material. For painted cabinets, regular cleaning with a mild detergent and touch-ups for chips or scratches are recommended. Adhesive paper and vinyl wraps should be kept dry and clean, and avoid prolonged exposure to direct sunlight. Wood veneers can be maintained with occasional polishing and should be protected from excessive moisture.